
Why More Dartmouth Homeowners Are Choosing Interlock Driveways
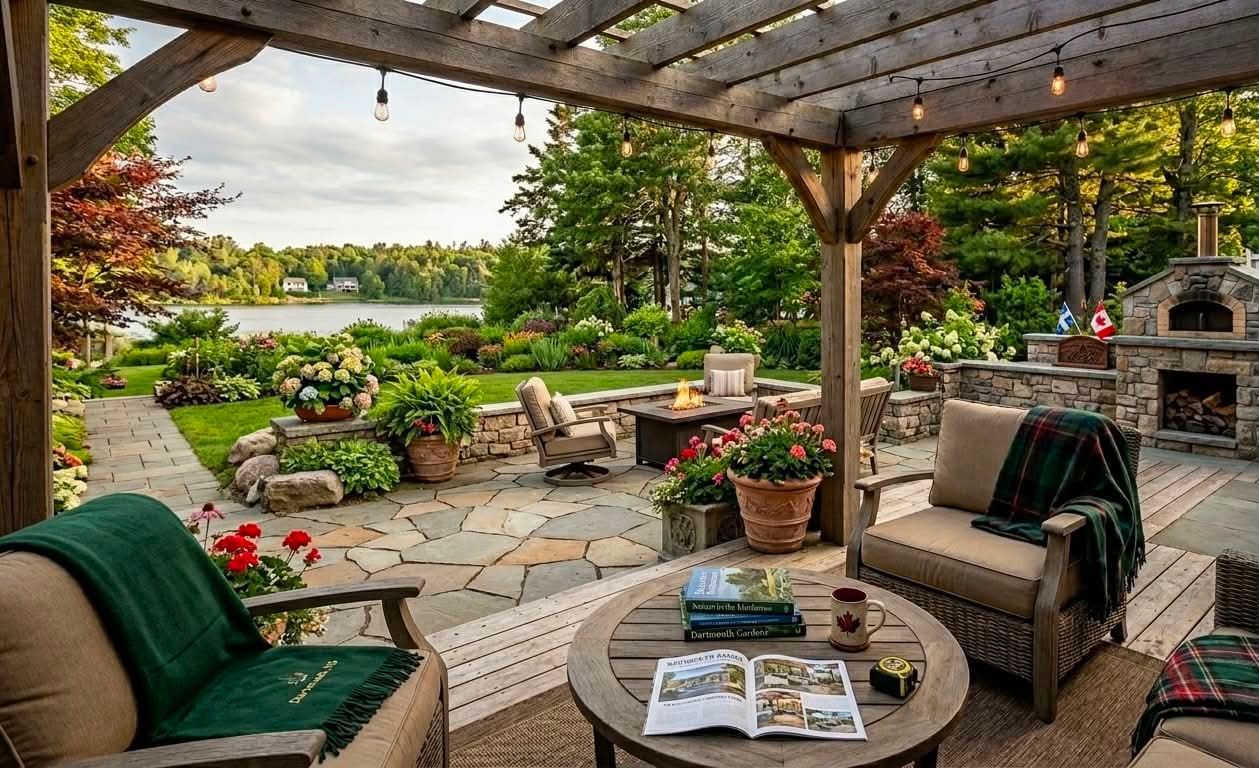
Patio Design Essentials
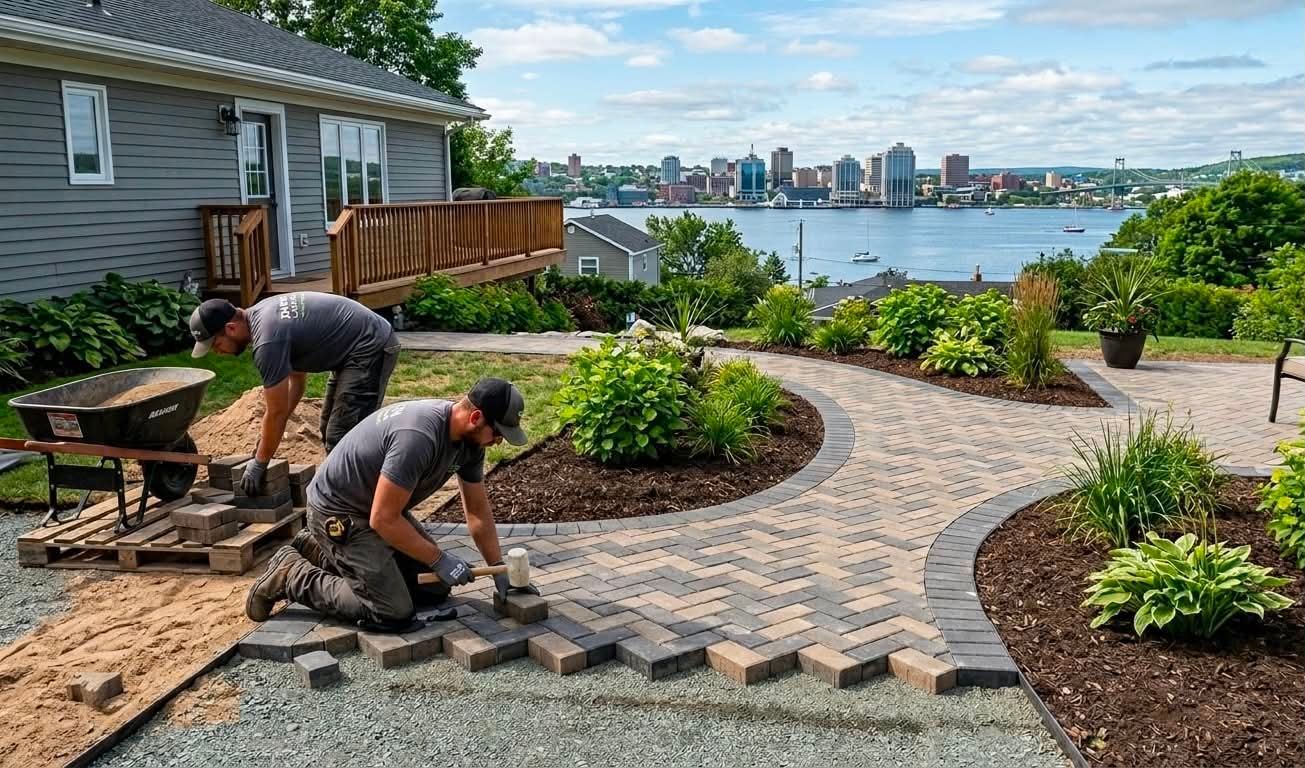
Start the Season Right with a New Interlock Driveway in Dartmouth

When to Book Your Spring Landscaping Project in Dartmouth
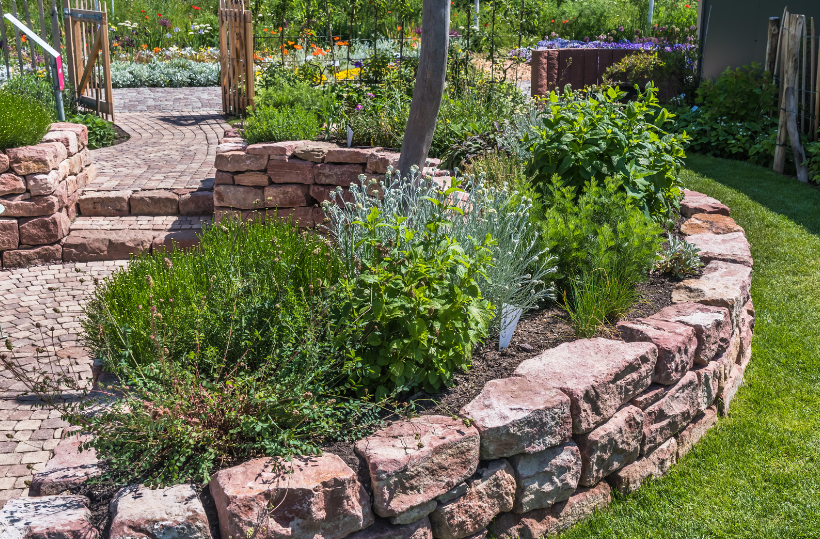
Transforming your outdoor space doesn’t have to be a daunting, time-consuming endeavor. With a little planning and some elbow grease, you can achieve noticeable improvements in just a weekend. Here are some landscaping projects you can complete in two days or less to refresh your yard and enhance your home’s curb appeal. Create a Garden Path A garden path is both functional and aesthetically pleasing, guiding visitors through your garden while adding structure and charm. To install a simple path, start by marking the desired route with string or a garden hose. Clear the area of grass and debris, then lay down a weed barrier fabric. Choose from materials like gravel, stepping stones, or pavers. Arrange your chosen material according to your design, ensuring a level and stable surface. This project can dramatically improve the flow and accessibility of your outdoor space. Build a Raised Garden Bed Raised garden beds are an excellent way to grow vegetables, herbs, or flowers with less effort and improved soil drainage. To build one, select a sunny spot in your yard. Gather materials such as treated lumber, concrete blocks, or recycled bricks. Construct a rectangular or square frame to your desired size, securing the corners with screws or brackets. Fill the bed with a mix of compost and topsoil, and you’re ready to plant. Raised beds are not only functional but also reduce the need for bending over, making gardening more comfortable. Install a DIY Fire Pit A fire pit is a wonderful addition to any backyard, providing warmth and a focal point for gatherings. To create a simple fire pit, dig a shallow hole in a level area of your yard. Line the hole with gravel to promote drainage, then arrange a circle of fire-resistant bricks or stones around the edge. Ensure the structure is level and stable. For added safety, surround the fire pit with gravel or a non-flammable material. This project adds a cozy touch to your outdoor space and can be enjoyed year-round. Refresh Your Flower Beds Revamping your flower beds can make a significant impact on your garden’s appearance. Begin by removing weeds, dead plants, and debris from existing beds. Loosen the soil with a garden fork or tiller, then mix in compost or well-rotted manure to enrich it. Choose new plants that complement your garden’s color scheme and light conditions. Arrange them according to their height and spread, then plant and water thoroughly. Adding a layer of mulch helps retain moisture and suppress weeds, giving your flower beds a polished look. Build a Simple Privacy Screen If you’re looking for a quick way to add privacy and style to your yard, consider building a simple privacy screen. Use wooden lattice panels or bamboo fencing to create a decorative and functional barrier. Secure the panels to sturdy posts set in the ground, or attach them to an existing fence. To enhance the look, plant climbing vines or shrubs around the screen. This project can create a secluded area for relaxation or outdoor dining. Upgrade Your Lawn A lush, green lawn is the foundation of a beautiful yard. To give your lawn a quick upgrade, start by mowing it at the correct height for your grass type. Next, use a garden fork to aerate the soil, which helps improve air and water penetration. Apply a balanced fertilizer to promote healthy growth. If your lawn has bare spots, overseed with a suitable grass seed blend - or if your yard is completely bare in some areas, consider installing sod. Finally, give your lawn a thorough watering to encourage new growth. This simple maintenance can revive a tired lawn and enhance your yard’s overall appearance. Add a Container Garden Container gardening is a versatile way to add greenery and color to your outdoor space. Choose a variety of pots and containers in different sizes and styles. Fill them with a mix of potting soil and compost, then plant herbs, flowers, or small shrubs. Arrange the containers on patios, decks, or along pathways for an instant garden upgrade. Container gardens are also ideal for small spaces or for adding greenery to areas with poor soil conditions. These weekend landscaping projects can rejuvenate your outdoor space, making it more functional and visually appealing. With a little planning and effort, you can enjoy a refreshed garden and improved curb appeal in no time. So grab your tools, gather your materials, and get started on transforming your yard into the perfect outdoor retreat. And if you like these ideas but don't have the skills or tools to implement them yourself, call our landscaping experts for a helping hand!

Creating a sustainable outdoor living space isn't just a trend — it's a vital step toward reducing your environmental footprint and enhancing your home and community. By making mindful choices, you can transform your yard into a haven that supports local wildlife, conserves resources, and contributes to a healthier planet. Here are a few tips to help you get started on your journey toward a more sustainable backyard. Embrace Native Plants Native plants are the cornerstone of a sustainable garden. They are adapted to your local climate and soil, requiring less water, fertilizers, and pesticides compared to non-native species. By planting varieties that naturally thrive in your area, you'll attract local pollinators such as bees and butterflies, which are crucial for maintaining biodiversity. Research which native plants are suitable for your region and incorporate them into your garden design for a vibrant, low-maintenance landscape. Implement Water-Saving Techniques Water conservation is a key component of a sustainable backyard. Start by installing a rain barrel to capture rainwater from your downspouts. This harvested water can be used to irrigate your garden, reducing your reliance on municipal water supplies. Additionally, consider incorporating drip irrigation systems that deliver water directly to the plant roots, minimizing evaporation and runoff. Mulching your garden beds helps retain soil moisture, reducing the need for frequent watering. If erosion is a problem, consider having your yard graded to improve water retention and absorption. Create a Composting System Composting is an excellent way to reduce waste and enrich your soil. By composting kitchen scraps, yard clippings, and other organic materials, you can create nutrient-rich compost that enhances soil fertility. This reduces the need for synthetic fertilizers, which can be harmful to the environment. Set up a compost bin or pile in a convenient location in your yard and turn it regularly to speed up the decomposition process. Over time, you’ll produce valuable compost that can be used to nourish your plants and garden beds. Foster Biodiversity with Wildlife-Friendly Features Encouraging wildlife in your backyard not only supports local ecosystems but also adds beauty and interest to your garden. Create habitats by adding birdhouses, bat boxes, and bee hotels to provide shelter for various species. Planting a diverse range of plants, including flowering plants, shrubs, and trees, offers food and refuge for wildlife. Avoid using chemical pesticides and herbicides, as these can harm beneficial insects and wildlife. Instead, use natural pest control methods such as introducing predatory insects or using organic sprays. Opt for Sustainable Landscaping Practices When planning your landscape, choose materials that have a lower environmental impact. For instance, opt for permeable pavers or gravel instead of concrete for walkways and patios to allow water to filter through and reduce runoff. Incorporate hardscaping elements made from recycled materials or sustainably sourced wood. Additionally, consider replacing traditional lawns with ground covers or alternative grasses that require less water and maintenance. When hiring a landscaping contractor, choose a company like Dartmouth Landscaping that makes sustainability a priority! Reduce, Reuse, and Recycle Incorporate the principles of reducing, reusing, and recycling into your backyard projects. Repurpose old furniture or building materials to create unique garden features or structures. Use recycled materials for garden beds, fences, or trellises. By minimizing waste and making thoughtful choices, you can create a more sustainable and resource-efficient backyard. Creating a sustainable backyard is a rewarding endeavor that benefits both the environment and your well-being. By making thoughtful choices about plants, water use, waste management, and materials, you can develop an outdoor space that is both beautiful and eco-friendly. Start small, and over time, your efforts will contribute to a healthier, more sustainable planet.
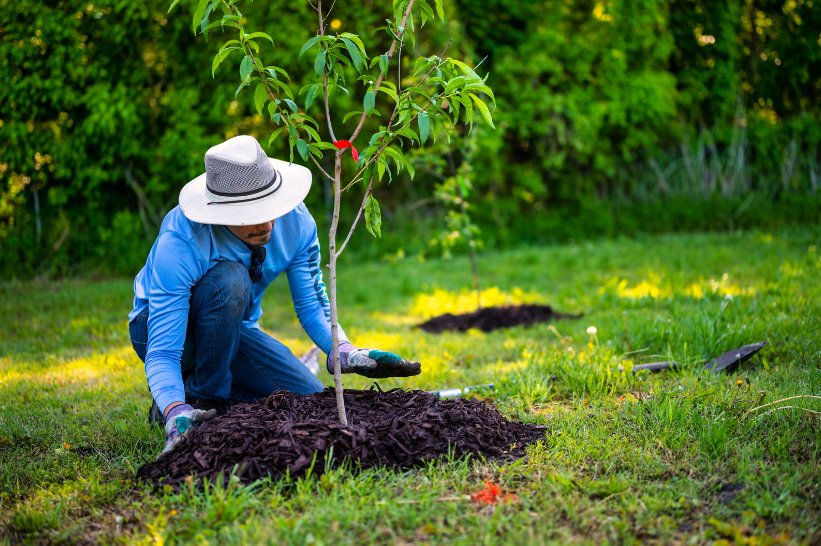
Planting young trees is a rewarding investment in the future beauty and health of your landscape. Proper care during the early stages of a tree’s life is crucial for ensuring it establishes a strong foundation and grows into a robust, mature tree. Here’s a comprehensive guide on how to plant and care for young trees, setting them up for long-term success. Choosing the Right Tree Before planting, selecting the right tree for your landscape is essential. Consider factors such as the tree’s mature size, growth rate, and suitability to your local climate and soil conditions. Opt for species that thrive in your region and are appropriate for the space available. For example, a large oak might not be suitable for a small urban garden, whereas a compact dogwood could be a perfect fit. Preparing the Planting Site Choose a planting site that provides adequate space for the tree to grow to its full size. Ensure it is far from structures, power lines, and other plants that could compete for resources. Before planting, we recommend testing your soil to determine its pH and drainage characteristics. Most trees prefer well-drained, loamy soil. If your soil is clayey or sandy, you might need to amend it with organic matter to improve its structure and fertility. Once the soil is prepared, clear the planting area of weeds and grass to reduce competition for nutrients. Dig a hole that is twice as wide and as deep as the root ball of the young tree. This allows the roots to spread out easily and establish a strong base. Planting the Tree The best time to plant young trees is during the dormant season, either in late fall or early spring. This minimizes transplant shock and allows the tree to acclimate before the growing season. Gently remove the tree from its container or burlap wrapping. Place it in the center of the hole, ensuring that the top of the root ball is level with or slightly above the surrounding soil. Backfill the hole with the original soil, tamping it down gently to eliminate air pockets. Water the tree thoroughly after planting to help settle the soil around the roots. Watering and Mulching Young trees require regular watering to establish their root systems. Water deeply once a week, especially during dry periods. Ensure the soil remains consistently moist but not waterlogged. Reduce watering frequency as the tree matures and becomes more established. We recommend applying a layer of mulch around the base of the tree, extending it out to the drip line. Mulch helps retain soil moisture, suppress weeds, and regulate soil temperature. Use organic mulch, such as wood chips or bark, and keep it 2-4 inches deep. Avoid piling mulch directly against the tree trunk, as this can cause rot. Pruning and Training Minimal pruning is needed for young trees. Focus on removing any broken or damaged branches and shaping the tree to develop a strong central leader and well-spaced lateral branches. Proper pruning helps establish a strong framework for future growth. If necessary, use stakes or tree guards to provide support and guide the tree’s growth. Ensure any supports do not constrict the trunk or branches. Remove stakes once the tree is established and can stand on its own. Fertilizing and Protecting Young trees may benefit from a balanced fertilizer applied in early spring. However, over-fertilizing can harm young trees, so follow recommended guidelines and avoid excessive applications. Keep an eye out for pests and diseases that could affect your young tree. Regular inspections and prompt action can prevent minor issues from becoming major problems. Additionally, protect the tree from mechanical damage, such as lawnmower or string trimmer impacts, which can injure the trunk. Planting and caring for young trees requires attention to detail and ongoing commitment, but the rewards are well worth the effort. By choosing the right species, preparing the site properly, and providing consistent care, you’ll help your young trees establish strong roots and grow into majestic, healthy specimens. With patience and diligence, you’ll enjoy the beauty and benefits of mature trees for years to come. If you ever need a helping hand with any of these tree care tasks, Dartmouth Landscaping is here to help with digging, mulching, fertilizing, and more!
When it comes to maintaining a healthy and attractive garden, mulch plays a vital role. It helps retain soil moisture, suppress weeds, regulate soil temperature, and improve soil structure. With various types of mulch available, choosing the right one for your garden can be a daunting task. Here’s a rundown of some of the most popular mulch options, along with their pros and cons to help you make an informed decision. Wood Chips and Bark Pros: Aesthetic Appeal: Wood chips and bark provide a natural, attractive look to garden beds. They come in various colors and textures, enhancing the visual appeal of your landscape. Long-Lasting: These mulches decompose slowly, so they require less frequent replacement compared to some other types. Weed Suppression: They form a thick layer that effectively suppresses weed growth. Cons: Cost: High-quality wood chips and bark can be more expensive than other mulch types. Potential for Nitrogen Depletion: As they decompose, wood-based mulches can consume nitrogen from the soil, which may necessitate additional fertilization. Pest Attraction: Sometimes, they can attract pests such as termites or carpenter ants. Straw and Hay Pros: Affordable: Straw and hay are generally inexpensive and readily available. Good for Vegetable Gardens: They are often used in vegetable gardens as they decompose relatively quickly and add organic matter to the soil. Weed Control: These materials create a thick barrier that helps prevent weed growth. Cons: Short-Lived: Straw and hay break down quickly, requiring more frequent replacement. Potential for Seeds: Hay, in particular, can contain seeds that may lead to unwanted weed growth. Aesthetic Issues: They may not provide the most polished look compared to other mulch types. Rubber Mulch Pros: Durability: Made from recycled rubber, this mulch is highly durable and doesn’t break down, meaning it lasts much longer than organic mulches. Low Maintenance: It doesn’t need to be replaced frequently and doesn’t attract pests. Good Drainage: Rubber mulch allows water to drain through easily, preventing waterlogging. Cons: Environmental Concerns: Although it’s recycled, rubber mulch is not biodegradable, which raises environmental concerns. Heat Retention: It can retain heat, which might not be ideal for plants that prefer cooler soil temperatures. Cost: Generally more expensive than organic mulches. Compost Pros: Nutrient-Rich: Compost adds valuable nutrients to the soil as it breaks down, improving soil health and fertility. Improves Soil Structure: It helps in soil aeration and water retention. Environmentally Friendly: Made from organic waste, it’s a sustainable option. Cons: Decomposition Rate: Compost breaks down relatively quickly, so it needs to be replenished more often. Appearance: It may not provide the most aesthetically pleasing look for garden beds. Cost: High-quality compost can be expensive if purchased in bulk. Pine Needles Pros: Acidic Soil: Ideal for plants that prefer acidic soil, such as azaleas and blueberries. Lightweight: Easy to spread and doesn’t compact over time. Weed Control: Provides effective weed suppression. Cons: Decomposition: Pine needles decompose slowly, so they need to be replenished less frequently. Acidity: While beneficial for acid-loving plants, pine needles can make soil too acidic for other types of plants. Tendency to Blow Away: In windy areas, pine needles can sometimes be displaced. Choosing the right mulch depends on your garden’s needs, aesthetic preferences, and budget. Each type of mulch has its own set of advantages and disadvantages. By understanding these factors, you can select the mulch that best suits your garden, ensuring it remains healthy, attractive, and low-maintenance. Whether you opt for the natural charm of wood chips, the affordability of straw, or the durability of rubber, the right mulch can make a significant difference in your garden’s success. If you need a little help deciding which mulch is best for you, contact our experts today! Dartmouth Landscaping can help you choose and install the perfect mulch for your style and needs.

In the competitive world of business, every detail counts. From the quality of your products or services to the efficiency of your customer service, each element plays a role in shaping your brand’s reputation. Among these elements, one often-overlooked factor that can significantly impact your business is landscaping. Investing in thoughtful and well-maintained landscaping is more than just an aesthetic choice; it’s a strategic decision that can enhance your business in many ways. First Impressions Matter The exterior of your business is the first thing potential clients, customers, and partners see. A well-landscaped property can make a powerful first impression. A neatly maintained lawn, vibrant flower beds, and strategically placed trees or shrubs create a welcoming atmosphere that reflects positively on your business. Conversely, unkempt or neglected landscaping can suggest carelessness, potentially driving away customers before they even step inside. Enhance Your Brand Image Landscaping can be an extension of your brand identity. By incorporating colors, themes, and styles that align with your brand’s image, you can reinforce your business’s message. For example, a tech company might use sleek, modern landscaping with clean lines and minimalist design, while a family-oriented restaurant might opt for lush, colorful gardens that convey warmth and friendliness. Landscaping that complements your brand helps create a cohesive and memorable customer experience. Boost Your Property Value A well-maintained landscape doesn’t just improve curb appeal; it can also enhance the value of your property. Potential investors or buyers will often see a property with quality landscaping as more valuable. Well-planned landscaping can increase the resale value of commercial real estate and make your property more attractive in the competitive market. Improve Your Employees' Satisfaction The impact of landscaping extends beyond clients and customers; it also affects your employees. A pleasant outdoor environment can improve employee morale and productivity. Providing green spaces where employees can relax during breaks or enjoy lunch can create a more enjoyable work environment. Furthermore, employees who work in a visually appealing space are more likely to feel valued and motivated. Promote Environmental Sustainability Incorporating eco-friendly landscaping practices not only benefits the environment but also aligns your business with sustainability goals. Using native plants, implementing water-efficient irrigation systems, and reducing chemical use can minimize your environmental footprint. Demonstrating a commitment to sustainability can also enhance your company’s reputation and appeal to environmentally-conscious consumers. Increase Foot Traffic Attractive landscaping can draw people into your business. Well-designed outdoor spaces, such as inviting entryways or landscaped patios, can catch the eye of passersby and encourage them to explore what you have to offer. This increased foot traffic can translate into more customers and potentially higher sales. Provide Functional Benefits Beyond aesthetics, landscaping can provide functional benefits. Properly placed trees and shrubs can offer shade, reducing cooling costs and creating a more comfortable environment for both customers and employees. Additionally, thoughtful landscaping can aid in managing stormwater runoff, reducing erosion, and controlling dust. Landscaping is a multifaceted investment that goes beyond mere decoration. By prioritizing landscaping, you’re not just investing in the appearance of your property; you’re investing in the overall success and perception of your business. So, take a moment to evaluate your current landscape and consider if improving it would better support your business goals. If you decide the answer is yes, call the commercial landscaping experts at Dartmouth Landscaping to get started!

Maintaining a lush, vibrant lawn requires a bit of finesse, especially considering our unique climate and seasonal variations. From chilly winters to humid summers, each season presents its own set of challenges and opportunities for lawn care. Whether you're a seasoned gardener or a novice homeowner, understanding how to properly care for your lawn throughout the year can help you achieve that coveted lush greenery. Here's a comprehensive guide to seasonal lawn care in Dartmouth, NS. Spring: Reviving Your Lawn As the snow melts away and temperatures begin to rise, spring marks the perfect time to kickstart your lawn care routine. Start by raking away any debris and thatch that may have accumulated over the winter months. This allows for better air circulation and prevents the growth of mold and fungi. Next, aerate the soil to alleviate compaction and promote healthy root growth. Once your lawn is prepped, it's time to fertilize. Choose a slow-release fertilizer high in nitrogen to encourage lush, green growth. Be sure to water your lawn deeply after fertilizing to ensure proper absorption. Finally, overseed any bare or thin patches to promote a thick, uniform lawn. Summer: Nurturing Your Turf Summer in Dartmouth brings warm temperatures and ample sunlight, creating ideal conditions for your lawn to thrive. However, it also brings the challenges of heat stress and potential drought conditions. To keep your lawn healthy during the summer months, be sure to water deeply and infrequently, preferably in the early morning or late evening to minimize evaporation. Mowing becomes a weekly chore during the summer, but be sure not to cut your grass too short. Aim to mow at a height of 2.5 to 3 inches to promote deeper root growth and shade the soil, reducing water evaporation. Additionally, keep an eye out for weeds and treat them promptly to prevent them from taking over your lawn. Fall: Preparing for Winter As summer fades into fall, it's time to prepare your lawn for the colder months ahead. Start by aerating the soil once again to alleviate compaction caused by summer activities. This allows for better nutrient absorption and promotes root growth. Fall is another great time to overseed your lawn, filling in any bare spots and ensuring a thick, healthy turf come spring. Fertilizing in the fall is essential to provide your lawn with the nutrients it needs to survive the winter. Look for a fertilizer high in potassium to help strengthen your grass's roots and enhance its ability to withstand cold temperatures. Finally, continue to mow your lawn as needed, gradually lowering the cutting height as temperatures cool. Winter: Protecting Your Lawn Winter in Dartmouth can be harsh, with freezing temperatures and heavy snowfall posing a threat to your lawn's health. While there's not much you can do once the snow starts falling, there are steps you can take to minimize damage. Avoid walking on frozen grass, as this can cause irreparable damage to the delicate blades. Additionally, refrain from using salt or de-icing chemicals near your lawn, as these can harm your grass and soil. By following these seasonal lawn care tips, you can keep your lawn looking green and healthy year-round. With a little bit of effort and know-how, you can create a lush oasis that enhances the beauty of your home and provides a welcoming outdoor space for you and your family to enjoy. If any of these tasks seem too daunting, just give our lawn care and landscaping experts a call. We offer lawn fertilization services, weed and moss control, overseeding, aeration, and much more!